

Written by CadmiumCD Project Manager, George Heitzmann
This is Part III of the “Using Survey Magnet for Virtual Events” series. Read Part I and Part II.
Continuing the series on using the survey magnet for virtual events, this post will focus on hybrid events which utilize a mixture of live and on-demand components.
Due to the COVID-19 pandemic, many larger in-person events were cancelled and switched to online events. A previous post covered how to set-up your evaluation portal for live digital/online events.
Looking into the future, as some restrictions are being lifted many event organizers are planning for smaller, more regional “in-person” meetings but provide a really robust online offering for the wider audience.
The challenge from a continuing education perspective is supporting credit requirements for both online and in-person meetings in the same portal as reporting and feedback mechanisms often differ.
For example, live sessions may need a session evaluation for credit while an enduring material or on-demand session may require quizzes for credit. You may also need to print separate certificates and credit reports.
This post will endeavor to outline this process and provide ideas on how you can implement a hybrid event evaluation portal.
This may all seem complicated, this post will attempt to summarize the process in 5 easy steps:
- Task Filtering
- Presentation Display & Filtering
- Activity Record and Authentication
- Certificates & Transcript
- Reports & Negativity Index
Task Filtering
The most complicated piece is to figure out what each user should have access to (evaluations, certificates etc) based on their event participation (online vs in-person). For example, will you allow in-person attendees access to the online portal? If so, can they claim credits for both online or in-person sessions and are there any restrictions (eg. cant claim online and in-person for the same session)?
My advice here is to create a spreadsheet with all the different scenarios you would like to support and what access each should have. This will inform the myriad of components that all need to work together – registration, system integration, content and credit management.
Using this spreadsheet, you can then filter your survey magnet tasks based on the learner participation. These task filters are used to assign learners the appropriate certificates, surveys, quizzes and presentations available to evaluate. The Survey Magnet has three types of filters – User Group, Registration Code and Unlock Code.
User Group
This filter can be populated by the learner while accessing the portal. You can have as many user group filters as is needed and can be configured to allow your attendee to select one or multiple user groups in the listing.
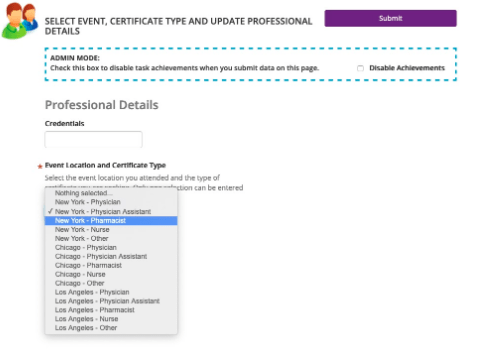
Registration Codes
This filter is typically populated via an integration or user import. This filter is not seen by learners but will filter the tasks depending on which registration code each user receives. This filter can be used if task filtering is done by the administrators rather than learners..
Presentation Display and Filtering
Next, we need to filter the presentations that are displayed to claim credit. By default, all presentations in the survey magnet schedule will appear for learners to select. However, you can filter the list of presentations based on need. You can create separate presentation listing tasks for different group of presentations you would like filtered using fields such as presentation type, format and credits.
Unlock Codes
From within each credit selection task, presentations can be further filtered utilizing presentation unlock codes. Unlock codes are added to user accounts based on items the user registered for and presentations they participated in or reviewed.
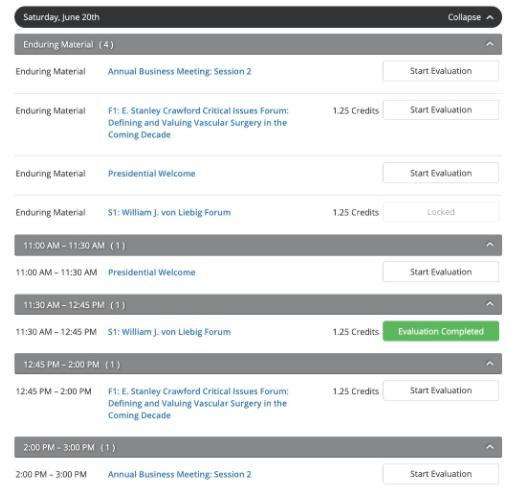
For hybrid events, the same credit selection task can be used to display both on-demand and live sessions for users to evaluate. The system can also be configured to ensure that users who evaluate live sessions for credit, cannot also “double dip” by selecting the same on-demand session for credit.
The image below displays how the enduring materials and live sessions display together in the presentation listing. Notice how the live presentations have dates associated while the enduring materials only have credits associated.
The live and on-demand sessions can also be displayed or hidden based on need. For example, only show live presentations during the conference and enduring materials after the conference.
Activity Record and Authentication
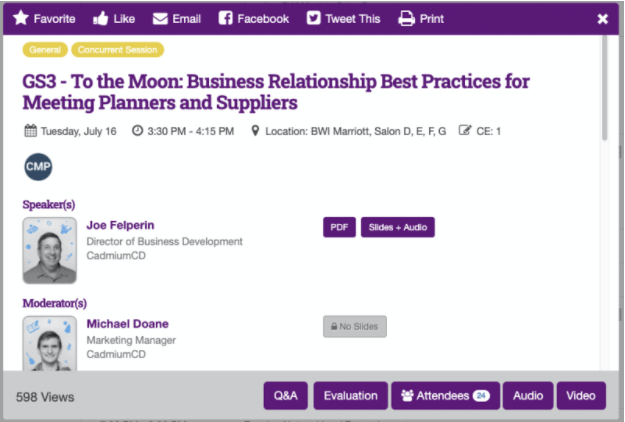
Users can access the session evaluations to complete for providing feedback or earning credit once the user has met requirements based on having registered for the activity or reviewed the contents of the activity.
The session evaluation can be accessed directly from the survey magnet presentation listing as displayed in a previous image. However, if the eventScribe website is being used, users can easily access the session evaluations from the gutter of the presentation and poster pop out or from the main navigation or tile screen. These links can be activated during or after the hybrid event.
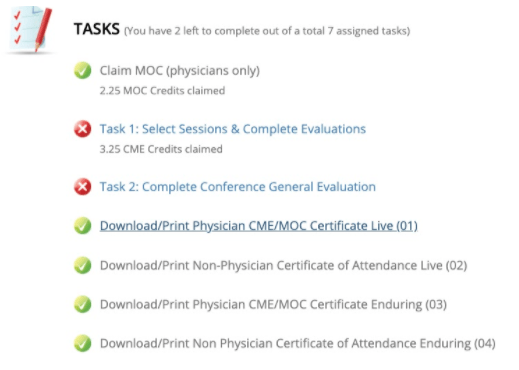
Certificates for hybrid events can be challenging depending on your specific accreditor requirements. The challenge is typically figuring out if on-demand and live credits can display on the same certificate and if the credit totals need to be separated depending on how the content was reviewed (live vs on-demand). Also, if your event supports multiple credit types (CME vs CNE), the different types typically require separate certificates which further complicate this process.
Luckily, the Survey Magnet can support displaying on-demand and live credits on the same certificate or separate certificates using the Custom Credit Table feature in the certificate builder.
The Survey Magnet also supports multiple credit types and multiple certificates. These certificates can be filtered for the user based on the registration codes and unlock codes as outlined above. This ensures that the learner only views the certificate with items they registered for and only displays the credits for content that was reviewed.
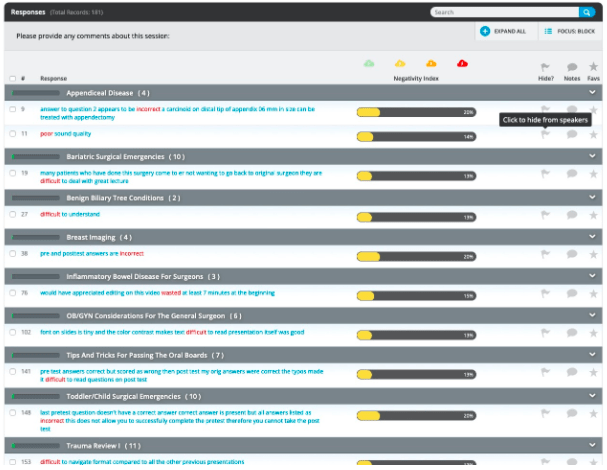
Reports & Negativity index
Finally, you will need to report these results back to your accrediting body. Depending on your provider and the type of activity, live and enduring material reporting often differ. For hybrid events, you may need to separate out the credit totals based on the credit type and how the learner reviewed the content.
To assist, the Survey Magnet has a selection of stock evaluation, credit and quiz reports depending on your requirements. These can be sorted and separated based on credit type or content type. These reports also come in a variety of export options including word, PDF and excel export formats. To see a detailed list of survey magnet reports, click here! Custom reports are also available at a fee.
Pro tip –
The Negativity index can be used to find all negative comments from reports and hide them before the reports are shared with speakers or organizing committee members. The negativity index tool searches all comments submitted by learners in evaluation responses and flags negative and offensive responses for your review. You can then decide to hide the comments that you do not deem helpful.
Want to use Survey Magnet for your continuing education events?
Request a one-on-one demo with an expert, or submit an RFP to get started today.
About George
George Heitzmann manages software projects focusing on events and continuing education management. Originally from South Africa, he graduated from the University of Cape Town with a Bachelor of Business Science Degree in Marketing and received a Project Management Professional (PMP) Certification from the Project Management Institute. At CadmiumCD, George is project manager for the Survey Magnet.